DIY paper clip earrings
November 29, 2011
 Recently I felt myself falling into sort of a creative rut. I took a little break from crafting and began perusing my favorite blogs as well as the always inspiring craftgawker. During my ventures, I stumbled upon a bunch of really fun new DIY projects, one of which I had to try right away –paper clip earrings. I love when I already have all of the materials required to complete a project. Anyway, after finishing one pair I was hooked. Not only did they turn out really cool, I strangely enjoyed the therapeutic motion of winding string around wire. I made a bunch of earrings trying both colored hemp and yarn. I gave a pair to my friend, Laura, for her birthday and was super excited to hear her say she “could totally picture them gracing the pages of the Anthropologie catalogue.” These earrings make unique holiday gifts, so I’m excited to pass along this tutorial. So here goes, my friends…
paper clip earrings
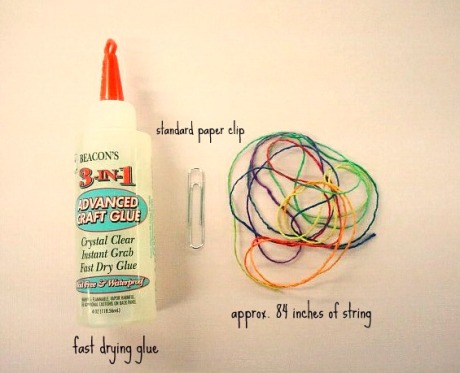
what you will need:
As far as the glue is concerned, one that dries clearly and quickly is ideal. I took a picture of only one paper clip, but obviously you will need two. Also, I know 84 inches sounds like a lot of string, but if you plan to wrap them the way I did, in a continuous pattern with minimal knots, it is best to use one really long piece of string. Anyway, next you will unbend the paper clip at all of the rounded edges…
Once the edges are all open, you will shape it into a triangle. The open side of the triangle will overlap a bit, which makes it easier to bind the sides together. Next you should tie a knot, secured with glue, at a point on the triangle, like so…
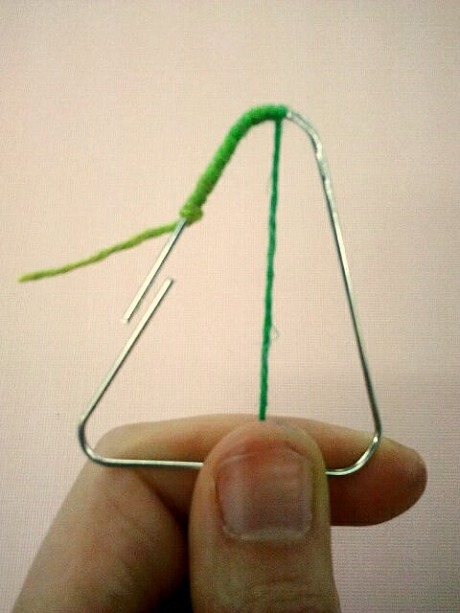
Add a tiny bit of glue to a small area of the paper clip, as it will dry pretty fast, and wrap the string around and around in a tight fashion. I try to wind the string away from the opening so that I may use it to my advantage. Rather than spending lots of extra time pulling the ridiculously long piece of string through the triangle with each turn, you can simply slide it in through the opening. You will see what I mean…
Please excuse my poorly trimmed nails:) The only tricky part of this project is wrapping the overlapping, open side of the triangle. I tried to overlap the sides one on top of the other rather than side by side so it would be less visible. Just do your best to hold them in this position with a good amount of glue while you wrap. It’s really not that hard, I promise. Once the string wraps all the way around, wrap it to a point just below the top of the triangle so you may begin the infinitely easier task of wrapping it across the triangle. Try not to go too crazy with the glue so the earrings look nice and neat. I left space at the top and bottom because the string is most secure from unraveling. When you reach a stopping point, tie a knot and secure it well with glue. They should somewhat resemble these…
That’s my friend Laura wearing her new earrings. I love how they happen to match her shirt perfectly! You can do so many different things with these earrings. Instead of wrapping them so tightly, you can make a sort of webbed, dream catcher look, and even add some beads to it…
If you decide to use yarn, you can achieve some really interesting looks. I should note that yarn is much more stretchy, so you won’t need nearly as much as you would with, say, hemp. I would go so far as to say you may need only half the amount. If you like the rainbow hemp, you can purchase some at a lovely shop called Hemp Hutt. I hope this tutorial was clear enough. This is my first one! Enjoy and let me know how it goes!
Of course, you will need some music for inspiration. Here is a random playlist of awesome songs.
Don’t worry, though. If you don’t feel like doing this, but you think the earrings look cool, I’m selling them in my etsy shop!
a pumpkin bread pudding recipe to soothe the soul…
November 25, 2011
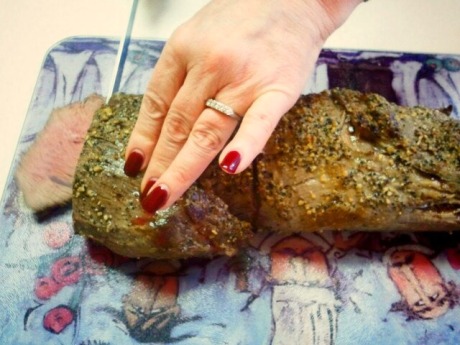
This year’s Thanksgiving may very well have been the tastiest one yet. Although we decided to forgo the turkey, we compensated for its absence with plenty of old favorites and new ventures. The spread included pepper-encrusted beef tenderloin, pulled pork BBQ, potato casserole, gouda and gruyere mac ‘n’ cheese, fresh baked sour dough rolls, and an assortment of sweets -including my first attempt at bread pudding. I must admit that I was pretty happy with the finished product. I found the recipe on one of my favorite cooking blogs, Smitten Kitchen, which adapted the recipe from the October 2007 issue of Gourmet Magazine. I love pumpkin and I love bread pudding, so I was really excited to find this great seasonal combination. It was so easy to make that I wanted to pass it along to anyone with similar taste buds to my own. Even people that don’t particularly like pumpkin will probably like this as the flavor is not overwhelming at all. So here goes…
Pumpkin Bread Pudding
(borrowed from Smitten Kitchen)
1 1/2 cups whole milk (Or 1 cup heavy cream plus 1/2 cup whole milk)
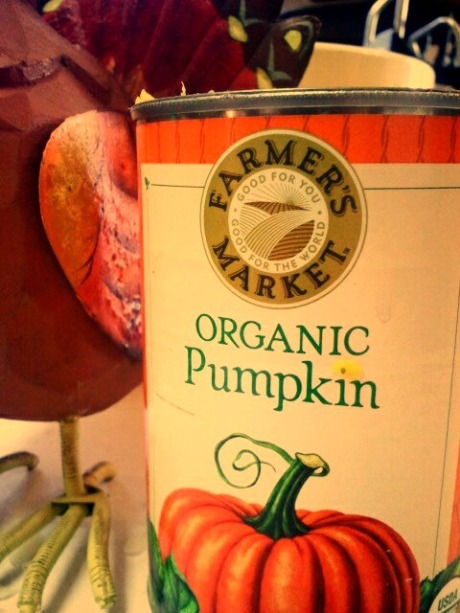
3/4 cup canned solid-pack pumpkin
1/2 cup sugar
2 large eggs plus 1 yolk
1/2 teaspoon salt
1 teaspoon ground cinnamon
1/2 teaspoon ground ginger
1/8 teaspoon ground allspice
Pinch of ground cloves
2 tablespoons bourbon (optional)
5 cups cubed (1-inch) day-old baguette or crusty bread
3/4 stick unsalted butter, melted
Preheat oven to 350°F with rack in middle
While oven is preheating, toss the bread crumbs in the melted butter in an 8-inch square baking dish until they are pretty evenly coated. In a separate bowl, mix the rest of the ingredients and then pour evenly over buttered bread crumbs. Bake for 25-30 minutes until set. Serve with whipped cream or ice cream. I used Breyer’s coffee ice cream and the flavors were great together.
In closing, here are a few of the happy moments from my family’s Thanksgiving…
back porch music
November 16, 2011
I just finished making a pretty Autumn playlist. Many of my song selections were inspired by my wonderful parents, who bestowed upon me and my siblings the gift of good music. One of my fondest childhood memories involved sitting on the back porch with my family, drinking tea, and listening to the likes of Joni Mitchell, Neil Young, Leonard Cohen, and many other audibly intoxicating musicians. Of course the crickets made great back-up singers. This music was powerful enough to compel the younger version of myself to commit those fleeting moments to memory. I knew they were something special. Listening to these songs will forever transport me to a simpler, more innocent time. It’s funny how music can shape who you become. The melodies, the lyrics, and the voices -the images they evoke- are permanent fixtures in my mind, always there to influence my perception of and approach to life. I love the way music makes me feel significant in the face of such a big wide world and a universe beyond my comprehension. It’s miraculous, really. Many of my most peaceful moments take place when I’m alone with music. I am so keenly aware of myself during this time, and to me, this is essential to true happiness. In closing, enjoy these live performances!
a creative addiction.
November 15, 2011
My love of arts and crafts began when I was a kid, as is the case for many people. Give me construction paper, glitter, clay, paint, popsicle sticks, or even twigs and flowers, and I was a happy girl. When most of my peers lost interest in crafts, my need to create became even stronger. Collecting materials to create something new and pleasing to the eye has always brought me great happiness, and I hope it always will. Over the past year I’ve been slowly but surely developing a little business to sell handmade jewelry as I create far too many things to keep for myself. Originally, I chose Pink Moon as my business name, which also happens to be one of my favorite Nick Drake songs. Then I decided to translate the name into Spanish because it sounded more feminine and exotic. Luna Rosa! It just has a nice ring to it. At the moment, a majority of my jewelry is made with fabric buttons, but I recently began taking a metal jewelry class to expand my skills. I love it. My goal is to eventually offer mostly metal jewelry creations. No matter what materials I use, my underlying mission is to create wearable art that is unique, bohemian, playful, and appealing to women of all ages and styles. One of my favorite parts of having a jewelry business is taking creative photos of my friends and family wearing my finished products. It gives me a great sense of accomplishment to know that I’ve made something wearable and flattering. I also love being able to provide my already beautiful friends and family with pretty photos of themselves. Who doesn’t have a secret desire to be a fashion model? The best part is that I do it all with the camera in my phone. I have a Samsung Galaxy and I use the Vignette application along with a free site called picnik to create some pretty nice photos. I would eventually like to invest in a quality digital camera, but for now, I’m pretty happy with my little Droid. Please check out my etsy shop. I’ve made a number of sales though I’m still trying to figure out the best ways to distinguish my jewelry from the rest of the talented etsy sellers. I did manage to sell earrings to women in Australia and Norway. It’s so exciting to know that people in other countries are wearing something that I made. I also created a facebook page, where I post all of my photos and provide updates about things that I’ve made, or places where I’ll be selling my jewelry. The holidays are rapidly approaching and I’m hoping some people out there would like to wear my creations. I make new things every day and I love to get feedback!
tis far better to give…
November 14, 2011
Words cannot describe how much I love Fall. I love the scent of woodsmoke, the clear starry nights, and of course the sight of foliage in its brilliant, graceful decline. Fall is also a great time of year to share the fruits of your labor with the people you love. With the holidays fast approaching, I’ve made it my goal this year to give in a more meaningful way. Among many other giving-related activities, I’ve decided to make all holiday gifts by hand. My first project of the season is Apple Pie Liqueur, a little something to awaken the taste buds and warm the heart. This liqueur embodies many things that I love about Fall -apples, cinnamon, and spirits. A lovely lady named Pat made this for me last Christmas. The recipe is so simple, I decided to give it a try. It’s so good! This liqueur makes a nice host/hostess gift for holiday parties, not to mention a great after dinner libation. Here is the recipe:
Apple Pie Liqueur
Ingredients:
1 Gallon Apple Juice
1 Gallon Apple Cider
8 Cinnamon Sticks
3 Cups Sugar
1/5 (750 mL) either Everclear (this can be hard to acquire) or Vodka with a high alcohol content
Directions:
In a large stock pot add apple juice, apple cider, cinnamon sticks, and sugar, then let it simmer covered for 1 hour. Enjoy the magical scent that will fill your kitchen. After an hour, remove the pot from the heat. Let it sit for about 20 more minutes then remove the cinnamon sticks (otherwise the cinnamon taste will be overwhelming). Let the liquid get completely cool before you add the alcohol, or else it will burn off a lot of the alcohol content. Once you add the alcohol and mix it thoroughly, you can use a funnel to pour the liqueur into glass vessels of your choice. Mason jars or even thrift store and flea market finds give it that cute home-made look. I added a cute piece of winter-esque fabric tied with baker’s twine to the top so it looks fresh from the farmer’s market. I also picked up some tiny mugs from Michael’s to include with the jar. They are the perfect size for sipping this winter time beverage. Enjoy!
fruition.
November 3, 2011
Hello my hopefully future friends! My name is Marie. At this very moment, I am 27 years old. I am starting this blog for a variety of reasons. First and foremost, my mind is overflowing with ideas and I often fear I have no place to keep and share them. With this blog, I am hoping to see these ideas come to fruition. Following through with things has always been a challenge for me as I have far too many interests and not enough time to enjoy them, so this blog will be my therapy. Living a whole and creative life is a tremendous challenge for me these days. I am at a crossroads in my life, much like many people my age. I recently left my job to begin working toward a Master’s Degree (I have a B.A. in Historic Preservation). While studying for the very daunting GRE and applying to various schools in my wonderful state of Virginia, I spend a majority of my day working at my family’s wig and hat shop. I also dedicate a good deal of my spare time to working on my jewelry business, Luna Rosa. I am a busy bee. While my life is full of happiness and beauty, I often feel anxious that I am not fully stopping to appreciate, explore, and dwell in it. Creating this blog is my attempt to do just that. Over the years, I’ve taken great joy in reading other peoples’ blogs. I envied the small worlds they created for themselves in the vast cyberspace frontier. Creating and maintaining my own blog always seemed so intimidating, but one day I came to the realization that it is exactly what I need. I need not worry what others will think of it. It is for me. It is a place where I can express myself to myself. Still, it would make me so very happy to share my little world with you all. You can expect me to talk about the following things that bring me great pleasure: music, art, history, food, all things handmade, and the people that I love.


